What is the best way to measure internal threads
The best way to measure internal threads depends on precision needs. For high accuracy (±0.0001 inches), a Coordinate Measuring Machine (CMM) is ideal, though it costs $25,000-$100,000. For affordability and quick checks, a Thread Plug Gauge costs $30-$200 and provides effective pass/fail results.
Thread Plug Gauge
Among the most practical and usable tools for internal thread measurement, the Thread Plug Gauge is outstanding on economic grounds for being easy to apply and reliable. The plug thread gauge mainly checks the dimensional accuracy of an internal thread in a component. It essentially consists of a “Go” and “No-Go” end that checks that the threads are manufactured to some recognized industry standard. It may cost from 30-200 dollars per gauge for a standard plug gauge, depending on the size and degree of accuracy. The more specialized ones go upwards of 500 dollars. To most manufacturers, this is a very affordable cost considering other measurement tools at a higher level of advancement. Its tough construction gives it a life of 10 to 15 years if well managed, hence not costing that much on mass production for hundreds of thousands of pieces that may be required to be inspected per day.
Inspection efficiency is further improved by its usage. One trained inspector can inspect between 300 to 500 pieces per hour using a thread plug gauge. This speed equates to the ability to inspect up to 4,000 parts in an 8-hour shift when used for standard-size threads. In comparison, a more complicated tool is the coordinate measuring machine or CMM, which can measure threads with extreme accuracy but could be inspecting only at rates of 20 to 50 parts per hour depending on the thread’s complexity and the precision level required. Efficiency concerns industries like automotive, plumbing, and construction manufacturing, where every threaded part has to do with consistency at level accuracy, not necessarily extreme at its best.
Thread plug gauges have marked advantages in maintenance and usability as well. While high-tech inspection equipment, such as an optical comparator or laser scanner, calls for regular calibration by specialists with updates on software, the simplicity of a plug gauge keeps the cost of maintenance low. The general recalibration for plug gauges can cost approximately $50 to $100 annually, depending on frequency and tolerance requirement of use, minute with advanced machines whose maintenance costs could lie in the region of 1,000-2,000 dollars per year. This eventually makes plug gauges be the favorites of small manufacturers or businesses on tighter budgets that need reliable quality control but cannot justify the cost of complex inspection systems.

Three-Wire Method
Among the most accurate methods of measurement of the pitch diameter in internal threads, the Three-Wire Method features. The method consists of putting into the thread grooves three thin wires, usually precision-ground to the exact size of the pitch of the threads; then it measures with a micrometer the total distance across the wires. From this measured value, using also the wire size used, the pitch diameter of the thread is determined rather accurately. This method, however, can report dimensional information, critical in the aerospace and automotive manufacturing sectors, among other applications, where a simple pass/fail inspection is provided by other thread measurement tools. The accuracy possible with the three-wire method can be as good as ±0.0001 inches, which allows for its use with threads with tolerances as low as 0.001 inches.
The cost of this three-wire method involves just the wires and a very high-precision micrometer. Precision micrometers needed for this approach typically range from $300 to $1,000. Three-wire sets, which must be sized specifically for different thread pitches, are another $20 to $50 per set. Companies measuring more than one or two thread pitches often invest in a full wire set, which can cost upwards of $500. This is more expensive compared to a plug gauge, while the level of accuracy obtained may justify the cost in critical applications. For perspective, a plug gauge would offer a pass/fail check, but where the three-wire method can provide the exact pitch diameter, thus more detail about thread geometry.
The three-wire measurement is a skill that requires careful handling since small misalignments while performing the measurement make quite a difference in accuracy. With the three-wire method, every thread requires from 5 to 10 minutes to measure with an experienced technician and is therefore much slower than the rate of 300 to 500 parts per hour achievable with plug gauges. For high-precision industries, however, this time investment is again offset by precision-measuring, especially threads with tight tolerances. This accuracy achieved ensures that parts will fit well with mating components, something very vital in industries like aerospace, where thread errors can lead to mechanical failures or safety risks.

Bore Gauge with Thread Pitch Gauge
One of the most accurate methods of measuring pitch diameter in internal threads is the Three-Wire Method. It involves setting three calibrated wires into the grooves of the threads and then taking a measurement over them with a micrometer for the pitch diameter. This is one of the most exacting methods, particularly in precision applications related to aerospace and automotive manufacturing. This setup allows for measurements with a precision of up to ±0.0001 inches, far greater than would be achievable with simpler inspection techniques. It’s very important when thread tolerances must be controlled within 0.001 inches-a necessity with components where meeting design specifications and preventing mechanical failure in applications where reliability is critical are paramount.
Investment in the three-wire method reflects this specialized use. A quality micrometer that can provide the required precision has a price range from $300 to $1,000 depending on the brand and the range of measurement. Wire sets also have to be purchased based on the pitch of the thread to be measured; individual wire sets sell between $20 and $50, while complete sets to cover a range of pitches sell for as much as $500. This may be a fairly large initial investment compared to other tools such as plug gauges, but the accuracy with which one gets is unparalleled, and thus justifies the cost involved in industries that have very stringent quality control requirements. Compared to the cost of a $5,000 – $10,000 coordinate measuring machine, the three-wire method provides a much more economical alternative while sacrificing nothing in terms of accuracy.
The time required for measurements to be taken by the three-wire method can vary. Ordinarily, skilled technicians require 5 to 10 minutes to measure one thread because much care is needed in alignment and handling to place the wires precisely in the grooves. By comparison, a plug gauge might allow as many as 300 pieces per hour for standard threads whereas with the three-wire method inspections could be far fewer and less effective for high-volume jobs. This does take longer, often necessary in industries where the accuracy of a thread impacts part performance directly, such as in the aerospace industry, which faces high stress and extreme conditions for their threaded components but must not fail. The time invested in such a highly accurate three-wire measurement is invaluable in the case of quality and safety for those applications.
Optical Comparator
This combination, with the Thread Pitch Gauge, forms a very practical means of measuring internal thread dimensions and makes it very good for those cases where quick inspections and reasonable precision are required. The only difference between them is that one was made to measure the internal diameter of a threaded hole and the other was designed to verify thread pitch by matching it against known templates. Putting all these together will allow for a much more complete inspection process, which will check for minor diameter accuracy and correct thread pitch. Bore gauges can run between $100 and $500 depending on the size and precision of the tool required, whereas a set of thread pitch gauges could be obtained for about $10 to $50. This makes them reasonable options for both high volume production settings and smaller manufacturing shops.
Bore gauges with thread pitch gauges are very practical in application and pretty efficient. With a bore gauge, operators can measure the minor diameter of a thread within ±0.0005 inches, which is generally good enough for most industrial applications such as plumbing and the making of general machinery. For example, quality control technicians in an automotive manufacturing plant may need to measure the minor diameter of threads on an engine part for an exacting fit with mating components. Using a bore gauge, they can make a single measurement in only 10 or 15 seconds-a rate that allows an inspector to check up to 200 to 300 parts per hour when the measuring tool is used efficiently. However, the thread pitch gauge is able to confirm thread pitch quickly in mere seconds and adds hardly any extra time to the overall process.
Bore gauges and thread pitch gauges, however, are pretty affordable for their price compared to higher-end equipment such as coordinate measuring machines or optical comparators, costing upwards of $25,000 to $100,000. While CMMs provide extreme accuracy, for general industrial uses where small diameter and pitch tolerance levels are somewhat lax, they are basically overkill. For example, in standard plumbing or industrial pipe fittings, threads may have from 0.005 to 0.01 inches of tolerance in size, which a bore gauge can easily handle. The marriage of the bore gauge with the thread pitch gauge provides the manufacturer with a sound, reliable inspection process that balances accuracy and cost without sacrificing efficiency in high-volume settings.
Coordinate Measuring Machine (CMM)
The Optical Comparator is a highly precise means of inspecting and measuring internal threads and, therefore, is usually considered only for very critical applications in industries like aerospace, medical device manufacturing, and automotive engineering. An optical comparator projects an enlarged silhouette of the thread profile using a light source and magnification lenses onto a screen for detailed inspections to be made on dimensions, angles, and profiles. They provide a degree of accuracy as fine as ±0.0001 inches, which is imperative in many applications where performance or safety problems may result from thread deviations. The various capabilities of optical comparators allow them to measure thread angles, pitch diameter, and even minor diameter for very versatile detailed inspections. High-quality models range from $10,000 to $30,000 depending on digital readouts and advanced software packages.
Concerning applications, optical comparators are put to use in quality control over the processes of manufacturing. This might concern the production of aircraft engine parts where the accuracy of threads should be to such a degree high that bolts and fasteners should not fail under extreme temperatures and stresses. The gain provided by an optical comparator might range from 10x to 100x and thus enables the operators to detect and measure even slight imperfections in the thread profile that could compromise component integrity. Unlike plug gauges or bore gauges, which are go/no-go tools, the optical comparator will provide a complete dimensional analysis-data useful for both documentation and quality assurance. During measurement and inspection of a single threaded component, for example, an experienced technician can take 2 to 5 minutes; that would imply that one is going to inspect about 60-100 pieces per hour assuming the criteria of complexity and precision put into perspective.
In addition to the other high-precision inspection tools, the optical comparator offers versatility with relatively inexpensive services. Although CMMs can achieve similar or even a little better accuracy, CMMs are very expensive, ranging between $25,000 and $100,000. Generally speaking, these CMMs also tend to be more complex in operation. Special training is normally required, and the inspection time is longer because of the detailed probing process. An optical comparator has the advantage of being simpler to operate and more versatile with respect to different thread sizes and profiles. That is very convenient, especially in specific environments where threads of different types are to be checked from time to time. Also, the optical comparator will save extra costs because of the reduction in specialized fixtures or tooling when changing setups between parts and improvements in efficiency for manufacturers who have been dealing with a wide range of components.
Thread Microscope
Among most state-of-the-art internal thread measurements, the Coordinate Measuring Machine, or CMM, is one of them. It gives very articulate three-dimensional data about the dimensions and geometry of the thread. Using a contact probe in contact with a series of points on the internal thread surface, CMMs catch the data with accuracy that may then be analyzed for measurement parameters such as pitch diameter, minor and major diameters, and thread angle. This opens up the possibility for accuracy as fine as ±0.0001 inches, which is essential for several industries that have very tight tolerances, such as in aerospace, manufacturing of medical devices, and high-performance automotive engineering. And this kind of precision does not come at a low price: rudimentary CMMs start from about $25,000, while the higher ones with additional functions can range between $50,000 to over $100,000, based on the level of automation, available software options, and measurement range.
In practice, CMMs are often applied for the inspection of complicated parts where dimensional accuracy is essential. Examples in aerospace might include the turbine engine parts that have complicated internal threads and must resist high pressure and temperatures. Applications such as these require thread measurements whose tolerances are generally within 0.001 inches or less, well within the capability of this high-precision tool, the CMM. CMMs do not stay behind the standard thread inspections but enable the measurement of helical angles, tapering, special thread profiles required for the full profile of internal threads-all beyond basic tools’ capabilities. This data captured can be stored digitally, thus, allowing manufacturers to maintain correct quality control records of every part inspected down to each unit, essential in areas bound by strict regulatory and industry standards.
Although CMMs are not as rapid as simpler gauges, their throughput represents a reasonable compromise between speed and precision. Skilled operators typically take 5-15 min to measure a complex internal thread profile with a CMM, which can enable inspecting 20-40 parts per hour. While this rate is slower than the 200 to 500 parts per hour that can be achieved with bore gauges or plug gauges, CMMs enable automated inspection processes that greatly reduce the need for operator involvement. State-of-the-art CMMs using robotic arms and automated fixtures provide completely automatic part measurement processes with a minimum of human intervention. While this automated setup adds from an additional $20,000 to $50,000 above the investment, it saves on labor and ensures a greater consistency level in high-volume inspections.
Maintenance and calibration are significant parts of owning a CMM because of its high degree of precision and complexity. Calibration annually for a CMM could be anywhere from $1,000 up to $5,000 depending on the model and usage. Calibration puts the machine at accuracy in time, which is very important for the environment that parts have to go through several quality checks. Software to operate a CMM usually has license obligations, often costing $2,000 to $5,000 per year to update and support. The hardware maintenance cost of components such as probes and sensors has a replacement or upgrade cost ranging between $500 and $2,000. While high, these costs ensure that the CMM remains accurate and reliable for high-stakes applications in which measurement errors in threads might result in production failures or trigger safety hazards.
Flexible Bore Scope with Measurement Capabilities
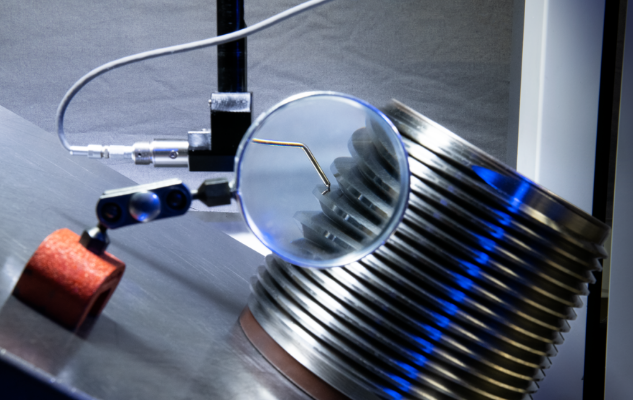
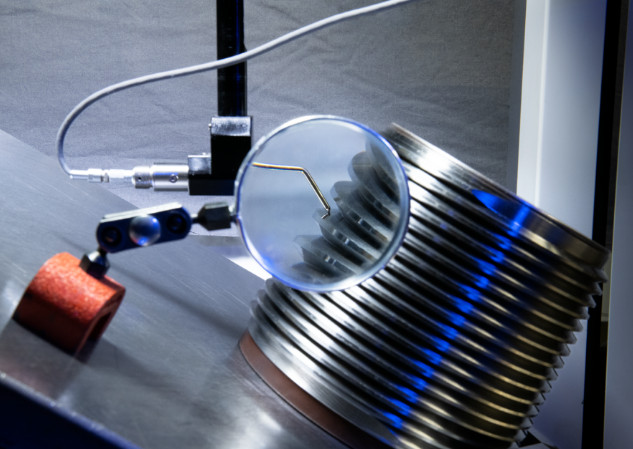
The Thread Microscope is a specialized tool designed for the detailed inspection and measurement of thread profiles, particularly internal threads. High power optics, from 20x to 200x, are employed here in order to project a well-elaborated image of the thread profile on either a viewing screen or digital interface. This magnification enables the operator to study minute details of thread geometry, such as pitch, angle, root radius, and flank surfaces, with considerable clarity and accuracy. In fact, accuracy with thread microscopes is good to up to ±0.0001 inches, making them invaluable for applications where even slight thread deviations may affect performance, as in high-pressure valves, aerospace fasteners, and precision instruments.
The applications of a thread microscope can be quite straightforward when industries are involved; therefore, in cases such as high precision and perfect finishing surfaces, a thread microscope would come in handy. Applications range from the medical sectors manufacturing surgical instruments and orthodontic implants, which typically consist of fine threads or dimensionally accurate value with no damage to this element when the technicians see through their threads with measuring feature for them to go forth into the human system. The base thread microscope, depending on the digital output, measurement software, and power of magnification desired, costs between $5,000 and $15,000. High-resolution models with an integrated digital imaging system and full automation may reach costs of more than $20,000. This is much lower in cost when compared to coordinate measuring machines, so thread microscopes prove to be a more affordable way for smaller to medium-sized manufacturers to test threads within their parts.
It is a very effective thread microscope because of its speed and efficiency in quality control environments. Measuring and inspecting a thread normally would take a time of 1 to 3 minutes for any given trained technician and is good enough to inspect 100 to 200 parts within one shift. This surely is pretty significant in various production environments that handle moderate to high amounts of threaded parts since it is the only way in which inspection thoroughness and productivity can be balanced. Thread microscopes play an important role in inspecting internal threads on component casings to predetermined tolerances in the manufacture of electronics, where threads must fit together so assembly integrity is guaranteed. In such cases, thread microscopes provide fast and accurate inspection without requiring much setup. This efficiency positions the thread microscope as an effective choice for ensuring thread quality within a high-speed, precision manufacturing line.

