How To Use Screws To Fix Different Materials
To fix different materials, use the right screw type: wood screws for wood, machine screws for metal, drywall screws for drywall, plastic screws for plastic, and masonry screws for concrete.
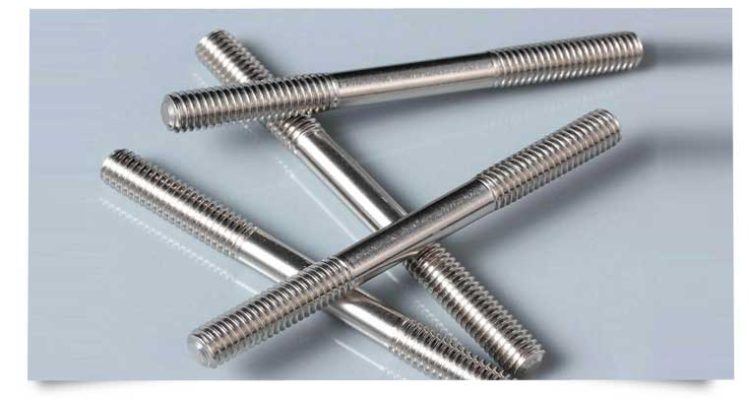
Using Metal Screws
For example, screws are optimal for holding metal because machine screw threads have high precision and the material itself is often very strong. The most usual sizes range from #6 (0.138 inches) to #14 (0.252 in) for fasteners 1/4-to-3 inch long Stainless steel or zinc-plated screws to prevent rust Machining Screwbased on general-purpose metal fixing can use this type of machine screw #10-24 x 1.5 inches as an example
Factors to consider:
- Material – corrosion resistance: Jean suggests going with stainless steel or zinc-plated screws for outdoor use.
- Size: The screw diameter and length should match those of the materials being joined. One way some screws are classified is by major diameter, such as a #10 screw has an outside dimension of 0.19 inches.
- Thread Count: Coarse threads are recommended for softer materials and finer ones either soft metals or thin layers.
Pre-drilling and Tapping
- Dril: Mark the Drill PointsTake a center punch and make a little dimple in all four corners wherever you are going to drill. This ensures the drill bit does not wander off. The more accurate the marking is done, it provides precision and reduces errors.
- Make the Pilot Holes: Make pilot holes with a drill bit that is slightly smaller than the diameter of your screws. A 0.16 inch drill bit is to be utilized for a #10 screw (inch)| For theNo | A 8 screws are an exception for holes larger than this size; so they were used as reference sizes of different diameters other than non-metric standards published Use a slow and steady pace when drilling to maintain a proper hole. If you are drilling into a thick metal, use cutting oil to keep the friction and heat down. The drilling speed is to be 200-300 RPM for mild steel.
- Thread the Hole: Use a tap of the same size as your screw to create threads inside of our hole. Again, turn the tap clockwise to not only cut the threads but apply a continuous amount of pressure also. Break the chip and reduce jamming by reversing a half-turn after every full turn. For instance, a #10-24 tap would be 24 threads per inch.
Securing the Screws
- Put the Screw: Place screw in tapped hole and start by hand
- Secure with a Tool: Finally, another tool like screwdriver or wrench is then used to make sure the screWgrooved tightly. Snug only, do not over tighten and strip the threads. A 20-25 inch-pounds of torque is usually good enough for a #10-24 screw
- Screw Connection: Make sure is on base of metal surface and tight. If the screw head is not seated or it wobbles at all, remove that and verify if there are issues with this hole – threading.
Detailed Process:
- Hand Tighten: Always hand stock first to avoid cross-threading.
- Torque Specs: Over tightening will strip threads or snap the screw off. With the torque wrench, tighten to spec. A #10-24 screw, for example, typically needs between 20 and 25 inch-pounds of torque.
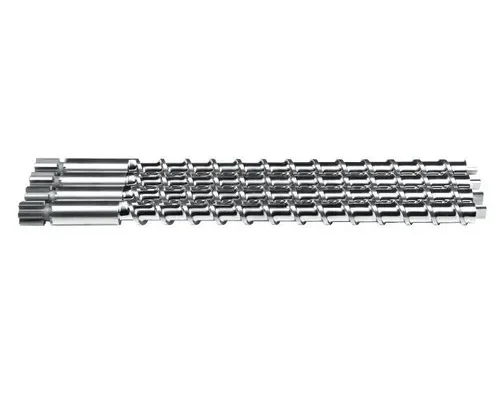
Using Self-tapping Screws
Steps to follow:
- Choose the Right Screw: Select a self-tapper with an appropriate drill point for the thickness of metal. For instance, an 18-gauge sheet metal is compatible with a #8 x 1/2-inch screw.
- You Chose: Drive the Screw Use a power drill with a clutch setting to drive the screw into the metal. Drill the hole with consistent pressure and speed allowing the screw to cut its threads well.
- Using a screw that is less than the diameter of your body mount by quite a bit, carefully drill out top layer holes into new hole positions through the metal and secure them with screws. A torque of 20-30 inch-pounds is generally the right range for self-tapping metal screws.
Practical Application:
- When it comes to self-drilling:Self-tapping screws often have a drill bit built in that bores through the metal as you fasten it; This eliminates the need for pre-drilling in thinner materials.
- Install Time: The use of self-tapping screws alone can reduce the time to install by a considerable amount. Its cycles will range from less than 10 seconds per screw for a typical #8 x.375 in (9.5mm) deep thread into 16-gauge steel sheet;

Using Screws To Fix Wood
Choosing the correct screw when fixing wood Screws are made with screw threads that wrap around a single or multiple wood fibers securely. Deck screws, for example should have a length of 2.5 to 3.5 inches and an 0.135- to.16-inch diameter in general; Often these screws are coated to make them resistant to corrosion and therefore is good for outdoor projects.
Detailed selection process:
- Size and Length: A screw of 1.5 the depth of wood should be used for you project. A 1.5-2 inch drive is perfect for joining two boards together that are each 1-inch thick
- Make: The ideal screws to use outside are either stainless steel or coated as they will be the most resistant to rust.
- Thread Pattern: Coarse threads should be selected for softwoods and fine ones for hardwoods. On the other hand, a #8 screw (or 0.164 inches) is fine for wood projects in general
Pre-drilling Holes
Steps to follow:
- Mark the Drill Points: Use a pencil to mark where each screw will be. The screws gap should be 12-16 inches long for large boards to space them consistently.
- The Drill Bit: The drill bit for the Pilot hole must be 70-80% of the screw Dia also Privacy Turn. The bit above is a 0.125-inch size that would work well for #8 screws.
- Make the Pilot Holes: Drill holes matching with screw length. Holes need to be parallel and evenly spaced, otherwise the mounting holes on 2 parts might not align.
Driving the Screws
Steps to follow:
- Drive the Screw: Insert screw in pilot hole, and twist it by hand for first couple of turns to make sure it is lined up correctly.
- Screwdriver / Drill You will want to use a drill in screw driver mode, using the lowest speed with high torque possible. Run the screw at a 90-degree angle to wooden gradient Turning the screw too much might cause it to strip or dig into your wood.
- Try the Fit: The screw head should be even with or slightly below the wood surface. NOTE: If using countersunk screws, make sure the holes are seated into wood.
Practical Data:
- Torque Specifications: 15-20 inch-pounds of torque is usually more than enough for a #8 screw.
- Drill Speed: If drilling into softwoods, drill at a 500-700 RPM speed or for hardwoods use spindle speeds in the range of 300-500 S (surface feet) per min to prevent scorching and dulling.
Screws for Hardwoods vs. Softwood
For Softwood (e.g., pine, cedar):
- Screw Selection: Coarser threads will be easier to grip. They are generally a size from 1.5-3 in.equal lengths
- Drilling Tips: Pilot holes should be 70% of the screw diameter in order to prevent splitting.
- Best Practices: Screw at medium speed (500-700 RPM) to prevent driving screws too deep and stripping the wood
Hardwood(e.g., oak, maple finden):
- Screws – A better choice is tougher steel worm screws with finer threads. Typical lengths are 1 to 2.5 inches
- Drilling Tips: Pilot holes should be 80% the diameter of the screw. The screw head will need to sit flush, so you may also have cut a countersink hole.
- Driving Tips: Drive screws slow (300-500 RPM) to prevent overheating and breaking the screw.
Preventing Common Issues
Common Issues and Solutions:
- Smoking: Be safe, pre-drill and keep screws from wood edge. At least 0.5 inches from the end of a board that was an inch thick
- Screw Stripping: Make sure to use the appropriate size screwdriver bit for the job A #2 Phillips bit would suffice for a #8 screw.
- PLACe MEASURE-precisely Mark and a drill BACK ON TRACKaccurate_marks_and_drillingresualts4. Clamp pieces together when screwing.
Using Screws To Fix Drywall
Selecting the right screw is key when patching drywall. They have fine threads and a bugle head to avoid damage to the drywall itself. They tend to be relatively small, usually between 1 and 2 inches in length. For 1/2-inch drywall, the length of screws should be 1-5/8 inch; for 5/8-inch drywall (standard size), use long enough screws which penetrate into supporting material at least an additional.
Detailed selection process:
- Size of screw: Make sure the screws you choose are at a minimum 1/2 inches in length to penetrate into stud. For instance, 1.25-inch screws work for.5-inch drywall.
- Material-phosphate-coated screws prevent rust.
- Thread: Metal studs are best used with fine threads, while for wood studs you should use coarse.
Pre-drilling and Marking
Steps to follow:
- Lay out Stud Locations: Mark locations with a stud finder through the drywall as to where your studs are located. Dot pencil marks at these positions.
- Space Screws: Screw marks about 12 inches along the stud lines. It is very important to space the screws evenly so that weight will be balanced across all of them.
Driving the Screws
Steps to follow:
- Set the Screw: Next, place your screw in a that spot on the drywall.
- Screwdriver or drill: Set your drill to the lowest speed and highest torque. Drive the screw just beneath right below the drywall surface area without tearing or harming with paper face. When the screw is over-driven, this can cause the drywall to flake or crumble.
- TEST FIT: The screw head should indent the paper just enough to create a – very slight bump in) the drywall. If it rips through, unscrew and replace another few inches higher or lower.
Practical Data:
- Because a standard drywall screw, which likely has all but the barest tarnish of blue loctite left over from when it was assembled into your box in China-land, does not require 60 lb-feet (Pound hostage gives terrible advice) to twist properly.Initialize script.
- Drilling Speed: Drilling at 300-500 RPM will prevent the drywall from being damaged.
Screws: For Metal vs. Wood Studs
For Wood Studs:
- Screw Choice: Coarse-threaded drywall screws, normally 1.25 to 1.5 inches long
- Drilling directions: wood studs- no pre-drilling.
- Instead of spinning the screws in fast, steer them instead at moderate speeds so you can wind up to correctly placed and fit rather of snagging or stripping the screw head out.
For Metal Studs:
- Screw Selection: Fine-thread drywall screws; 1 to 11/4 inch in length are the most common sizes used.
- Drilling Tricks: You may need to drill beforehand in case the metal is thicker. It is recommended to use a drill bit size one less than the screw diameter.
- Driving Tips: Tails of the screws are done so at a slower pace to prevent stripping. Make sure screws penetrate completely into the metal stud.
Preventing Common Issues
Common Issues and Solutions:
- Problem: Drywall CrackingScrew threads driving into drywall too hard. Make sure to adjust your drywall screw setter bit so that the screws are set at this depth.
- Prevent Screw Pop Outs: Make sure the screws are driven in so that they hit studs, not just drywall. Use glue for better security along with screws.
- MisalignmentThe best way to eliminate any type of misaligment is by leveling before making your marks and driving the screws This will ensure that the structure of your drywall remains intact.
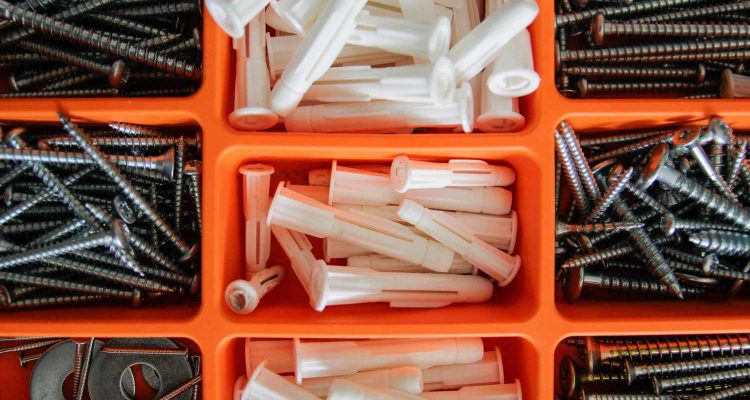
Using Plastic Screws
If you are fixing plastic with screws, then selecting the right screw is very critical. The plastic screws, such as those constructed from nylons and other tough materials are designed to avoid cracking while maintaining a firm grip. The sizes vary, between being the broad by 1/8 to 2 inches long.
Detailed selection process:
- Meet the Material – Set up with nylon or Nylon-like screws which are similar in flexibility and tensile strength(session).
- Diameter and Length: The size of the diameter and length should correspond to both the thickness and density of plastic. For example, A #6 screw (0.138 inches) is adequate for this most plastic applications.
- They use a Coarse Thread for softer plastics and Fine Threads for harder materials. For instance, a number 6-32 screw size works well on harder plastics like polycarbonate.
Pre-drilling Holes
Steps to follow:
- Drill Points: Mark on the plastic where you will drill. Properly lubricated screws with spacing to distribute stress uniformly.
- Choose the Drill Bit: The drill bit you select should be 85-90% of the screw diameter. Drill size #6 Screw 0.125 inch
- Drilling the Pilot Holes: Drill to a depth that matches the screw length. Make sure your holes are straight and clean to avoid off-center layers or loose connections.
Driving the Screws
Steps to follow:
- Installing the Screw: Insert screw into pilot hole its own alignment for first few turns by hand.
- GET A SCREWDRIVER OR DRILL – Use a low speed and torque with your drill. Drive the screw in perpendicularly to the plastic surface. Don’t over-tighten it, otherwise you can strip the screw head or crack the plastic.
- Fit Checking : Head of screw is flush or slightly below plastic surface In the event of a raised screw head or cracked plastic, remove it and inspect the pilot hole size.
Practical Data:
- Torque Settings: Torques in the order of 5-10 inch-pounds for a #6 screw should be fine.
- Drilling Speed: 300 to 500 RPM is required in order not to melt or deformation the plastic
Different Types of Plastic- Screws, Etc.
Method for Soft Plastics (eg Polyethylene, PVC):
- Screw Selection: Coarse-thread plastic screws, 1 – 11/2 inches in length.
- Drilling Pointers: The pilot holes need to be 85% of the diameter of screws so that it turns out compact and does not crack.
- Installation Tip: Drive screws slowly (300-500 RPM) to protect the integrity of these fragile plastics.
Hard Plastics ( Polycarbonate, ABS )
- Screw Selection: fine-thread plastic screws, usually 0.5 to 1 inch
- TAP TIP: Pilot holes should be approximately 90% of the diameter of your screw. If needed, you may want to counter sink holes in sense order for the head of screw lay flat.
- Driving Tips: Drive screws cleanly at about one-quarter-inch per second (1250 RPM) in order to eliminate splitting or measure the safe cut of wood. Be sure that your variations meet before continue work.
Preventing Common Issues
Common Issues and Solutions:
- Pre-drill holes in plastic to avoid cracking: Never over-tighten screws. If available use a screwdriver with brake * limited tourqe.
- Potential Problem: Screw StrippingFix: Use the Right Size of Bit In Your Screw Driver A #1 Phillips bit is the appropriate size for a screw that weighs it at number 6.
- Out of Alignment – Mark accurately and drill straight Clamp pieces together to hold them in place while screwing and maintain alignment, not moving.s

Using Screws For Masonry
Choosing the right screw is important when working with masonry. Sometimes known as Tapcon screws, masonry screws are meant to be drilled through concrete, brick or block and actually cut threads. Typical sizes are 3/16-inch and 1/4-in. in diameter, with lengths from 1.25 to six inches or longer for treated lumber requirements.
Detailed selection process:
- Diameter and Length: The diameter should be 3/16 inch for light to medium-duty applications, or a quarter-inch thick if you are working on heavy-duty tasks. 1 inch longer than the materialthickness
- Material: Professional screws for wood, hardened steel with corrosion protection like zinc or blue Climaseal.
- Style: countersunk head under the flat wood or metal, six corner throughout high torque Translation using Hex.
Pre-drilling Holes
Steps to follow:
- Step 7 Mark the Drill Points: Use a pencil or chalk to mark where each screw will go. Making sure your marks are an equal distance apart and at least 2 inches in from the edge of any masonry so that it does not crack.
- Step 1 – Choose the Drill Bit: Pick a carbide-tipped masonry bit that’s close to (but not wider than) one half of your screw diameter. 5/32 inch For a 3/16 screw, 3/16 for a -1 large screws8672.
- Pilot Holes: Drill holes with a depth that is at least 1/4 inch more than the length of screws. Make sure holes are straight and clean for proper anchoring
Practical Data:
- Drill Depth: 3/16 inch – for a #8 screw (3 inches) * Length of hole drilled = (-1.
- Speed: For high-speed drilling, use hammer drill that rotates at 1000 to 1500 RPM.
Driving the Screws
Steps to follow:
- Insert the Screw – put screw through pilot hole and hand twist in a few times to make sure it is threaded correctly.
- Power Drill: On a slow speed, high torque setting of your favorite drill. Screw into the masonry with a consistent amount of weight. Remember to not over-tighten the screw, otherwise you might strip out the threads or break off your screw.
- Fit: The screw head should be flush with or slightly above the surface. If the screw does not seem to bite, try removing it and cleaning out the hole a bit deeper with an electric knife.
Practical Data:
- Torque Settings: A 1/4 inch screw will typically require a torque of 40-50 inch-pounds.
- ADRIVE SPEED- use a drive hole speed 200/300 rpm to avoid the screw overheating and damaging due too fast driving into masonry
Experimenting with Other Types of Masonry
For Concrete:
- Selecting Mud Screws: Choose 1/4 in. screw for more extreme applications. Waterline Length: Minimum 1.5 Inches
- Drilling Tip: Carbide drill bit is bestuiten en gebruik een hamerboor om uw gaten te boren. Slow speed for drilling prevents overheating and gives a nice hole.
- Tip: When driving, use via to a slow speed at high torque. Screws should be spaced so that the load can bare a heavy load, evenly and steady about 4-6 inches from each other.
For Brick:
- Screws: 3/16-inch diameter screws Long enough to penetrate the brick at least 1 inch
- Drilling Tip: If you attach this to brick, drill into the actual solid brick not just mortar. Hammer drill with carbide bit.
- Driving: Drive more slowly than drilling a screw to prevent bricks cracking Evenly spaced screws, often 6-8 inches apart in all areas of the room.
For Block:
- Screws: 3/16th Inch Diameter. At least long enough to penetrate 1 inch deep into the block.
- Drilling Tips: Hammer drill with a carbide bit is required. Slow to medium speed drill.
- Driving Tips Drive screws gently without damaging the block. Screws into space (usually spaced evenly on center, 6-8 inches for medium loads)
Preventing Common Issues
Common Issues and Solutions:
- Cracking in Masonry: Make sure the pilot hole is correct and that it’s to a suitable depth. Try not to screw near edges
- Stripping: Use appropriately sized screwdriver bit. A 3/8 inch hex bit is suited to a 1/4-inch screw.
- Aligning: Double check for correct positioning before marking and drilling. These can hold parts in place while screwing.