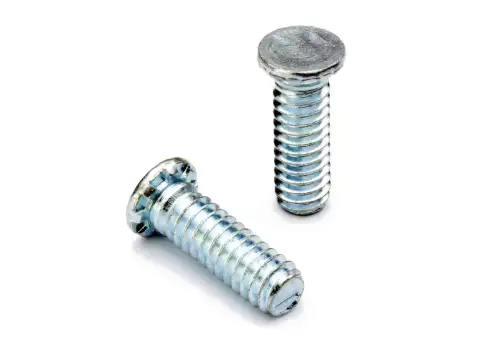
How to fit clinch studs
The steps for installing rivet studs include pre-processing, marking and drilling, cleaning and deburring, rivet stud installation, and post-installation inspection.
Required Tools and Materials
The main power of the riveting tool is between 800 and 1000 watts, and the weight does not exceed 5 kilograms. According to Waterman, the popular Bosch and Makita riveting tools generally sell for around 1000 to 3000 yuan.
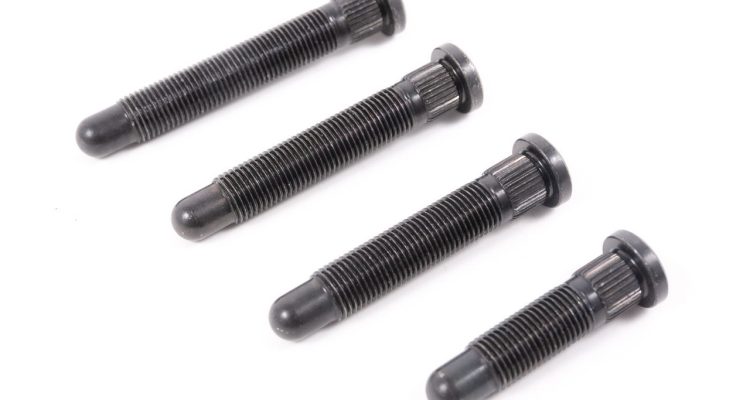
The most common specifications for rivet studs are M3, M4, and POB. M3 studs are common in electronic products, but M5 studs are still retained because they are used in other industries such as automotive.
The main function of these positioning fixtures is to hold the workpiece in place, and the quality of these fixtures directly affects the riveting effect and efficiency, as the price of high-quality accessories ranges from 500 yuan to several thousand yuan.
Drilling and reaming use electric drills with speeds of 1500 to 3000 RPM. Key brands: DeWalt, Hitachi (price 800-2000 yuan).
Protective glasses and gloves can protect the operator’s eyes and hands from being scratched by metal debris. The grade of protective glasses should meet ANSI Z87 standards. General specifications are priced at 50-150 yuan, and high-quality protective gloves must cost less than 30 yuan.
When installing rivet studs, specialized tools such as rivet guns or electric drills, and positioning devices are needed on site; protective equipment should be worn. Depending on the brand and configuration level, the cost of accessories will inevitably vary, ranging from 2000 to 8000 yuan.
Step-by-Step Installation Guide
The indoor installation process of rivet studs requires several important steps, each of which must be carefully carried out using specialized tools.
Preparation: Confirm the correct connection of the workpiece and rivet stud specifications. As a reference for step 1, if you are using steel plates with a thickness between 0.5 – 2mm, M4 studs are suitable. Ensure that the tool is working properly and set the electric drill between 1500 and 3000 RPM.
Step 2: Position marking and drilling. Use a marker or other tool to mark the workpiece, with an error within 1mm. Next, use an electric drill to make holes at the marked positions – the hole diameter for each stud must be slightly larger than the diameter of the plastic stud by 0.1-0.2 mm (if the difference is too large, it may not be installed).
Step 3: Cleaning and deburring (after drilling): Use an air gun and brush to blow off the internal metal debris and remove the burrs on the stepped side. According to the characteristics of the wire industry regulations in China and Poland, the diameter error after winding does not exceed 0.05 mm, and these two regions make up most of the global radial circlip spring products.
Step 4: Fix the rivet stud in place. Use the bidding formula to bolt or wedge the rivet stud into the drilled hole with a certain strength, but usually up to 1000 watts, and maintain this pressure directly, for no more than three seconds.
Step 5: Check the firmness. After removing the gun, use a torque wrench to check the firmness of the rivet stud. The torque of the M5 stud is five (5) Newton meters, in line with industry standards.
Step 6: Cleaning and finishing: Clean the work surface with a cleaning cloth and visually inspect the rivet stud for cracks or deformation. Reset the tool to its completion state, then record the operation data and any issues found for future reference.
Note: All operations must be strictly enforced to complete the quality installation of rivet studs. As a well-known industry expert said, “The devil is in the details, and every step is important.”
Post-Installation Inspection
Tighten all rivet studs with a torque wrench. Finally, the torque value of the M5 studs should be between 8 and 10 Newton meters, which is quite standard in the industry.
Then use a magnifying glass to check each rivet stud’s contact surface for cracks, deformation, or other defects. According to statistics, visual inspection can detect about 5% of riveting defects.
Instruments used for tensile testing of rivet studs (tensile test housing) M5 studs have a tensile strength > 300-400 N. If the tensile resistance is less than this value, it indicates insufficient riveting strength and measures should be taken.
Use calipers to measure the height and diameter of the rivet studs to verify if the dimensions are within the tolerance range. The height or depth of M5 studs is within a very strict tolerance range, such as 5±0.1 mm and diameter ±0.05 mm are common examples.
Depending on the actual application conditions, conduct aging tests on the rivet studs, exposing them to high temperature, high humidity, or corrosive environments. Usually, the test temperature of a high-temperature laboratory is 150℃, lasting 48 hours, while the test temperature of a household humid type (referring to humid heat) is greater than or equal to ninety-five percent (95%) humidity, lasting seventy-two hours.
Finally, record all inspection results obtained for each rivet stud (torque value, tensile size measurement, and environmental test).
As the famous quality management master Deming said, “Quality is not formed in inspection but is formed in the manufacturing process.” Scientific inspection and data recording can greatly improve the reliability and service life of the product.