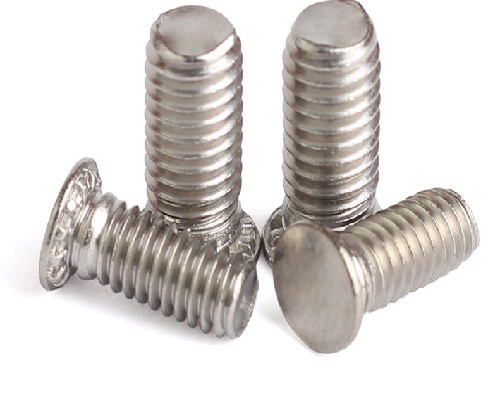
How To Effectively Install Self-Pressing Studs
Learn to install self-clinching studs with a guide covering tools, step-by-step process, common mistakes, and maintenance tips.
Tools and Materials Needed
Correct fitting of self-clinching studs needs a mix of precision tools and appropriate substances. The installation will be quite effective and reliable if the things used to do that are correct.
- Press-in Machine or Arbor Press – It is relatively important to put the stud into a machine or get it damaged, because without adding force one cannot mount the panel in its place. The force necessary depends on the material and size of the stud, but it is usually between 1,000 to 25,000 pounds. Ultimately, you will need to choose between a manual arbor press and a pneumatic press-in machine based on your production quantities and available physical effort.
- Nut Installation Anvils: Additional anvils that interface with the stud directly during installation. The anvil must just barely clear the diameter of the head of the stud to avoid upsetting both the stud and panel. A wrong anvil would cause the studs to be inserted not evenly, which in turn might damage the material and hence your installation.
- Precision – calipers or micrometers: The last thing we want is to spend all of this time doing this, just to find out the studs don’t fit perfectly. The thickness of the panel and stud diameters are measured to 0.001 inch with calipers, and micrometers. This will make sure the stud eats into the panel perfectly and does not destroy it.
- A minuscule amount of lubricant on the stud may help by reducing friction which ultimately results in a lesser installation force. This not only provides a more streamlined work process, it also retains the original condition of both stud and panel. There are different types of lubricant if the owner’s manual is not followed it can be in light machine oil form but this must only be used when referred as it will completly ruin your machine.
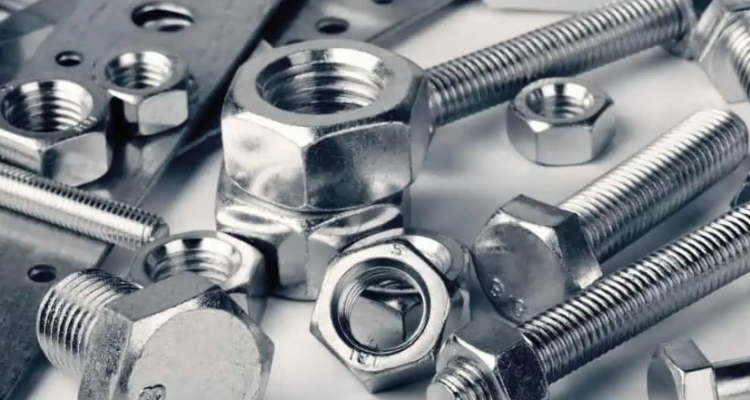
- Material specific stud: Correct material choice of studs is essential for optimal performance and longevity. A high quality steel stud will last a lifetime although in some environmental conditions, but for areas prone to corrosion stainless steel studs may be more suitable as they are resistant to rust. Aluminum studs, on the other hand, may be preferred for lighter-duty apps or those in which the panel does not need to support much mass.
- Safety Equipment: Fitting studs = use of heavy machinery. And Little thingiesSharp manoeuvrementantisNeeded. Wear safety glasses, gloves and with for safety from flying debris or accidents when handling the tools and studs.
Another major consideration in the application and selection process is that studs must fit the physical dimensions needed by the panel, and further have to be matched to the environmental conditions they will be exposed to. For instance, selecting a stud with better corrosion resistance for marine applications will dramatically extend the life and reliability of the assembly.

Preparation Steps
Assessing the Panel Material
Prior to approaching self-clinching studs installation, it is quite important for evaluating the panel material. The material being tapped cannot exceed the maximum hardness for which the stud is designed. This is generally HRB 80 for steel panels and HRB 70 for aluminum panels for the majority. When it comes to verifying that the panel is clinch-ready, one quick way might be utilizing a portable hardness tester for immediate readings.
Measuring Panel Thickness
Correct panel thickness is critical because this dictates the length of the stud to be used. The side panel will need to be thick enough that the clincher can close it around the stud; It cannot be so thick so as to not allow it. As a general rule, the panel thickness should be just under the height of the pilot hole in the stud. Measure the panel with a digital caliper (at several points) for thickness, as inconsistent thicknesses may cause the integrity of the installation to reduce.
Building the Install Surface
Make sure the surface is clean and free from any left over coatings or debris that can hinder good installation. Dirt, oil or other contamination will affect clinching. A thin deposit presents the possibility of the studs not sitting cleanly or securely in place, so care should be taken to clean the surface-a solvent-based cleaner such as acetone or a degreaser will do-before wiping down with a clean cloth.
Selecting the Correct Stud
Selecting the right stud depends on assigning the specs of a given stud to features of a provided panel. This includes the Diameter, Length and the material of the stud. A stud intended for a 0.5mm thick steel panel, for example, should generally have a protruding diameter that is sufficient to perform the clinching operation while sitting flush with the parent material surface. Specifications Sheet: Many distributors create detailed specifications sheets which outline the appropriate panel thickness for each stud size and material, making the selection quick and easy.
Get the Installation Tool
The installation tool is generally just an arbor press or some type of pneumatic press with a setting to apply the necessary force. This force to fracture can vary based on the material and diameter of the stud. For reference, installing a 4mm diameter stainless steel stud may take up to around 5000 pounds of force. The exact balancing of this is a real trick and anything that can be done to standardize the force though use of calibration tools or integrated with force gauges in the press will avoid under-applying and over-applying the force to such an extent as to get either no fit at all or alternatively to damage both stud and panel.
Step-by-Step Installation Process
Positioning the Stud
Align the stud properly over the pre-drilled or punched hole in the panel. The diameter of the hole should be slightly smaller than the stud in order to be place-bound properly–typically 0.1 mm to 0.3 mm, depending on the material and dia of the clinch stud. Make sure the stud lines up perfectly along the vertical axis with the hole. Aids to maintain this alignment, especially in repetitive or high-volume installation, are the use of a specialized fixture or jig which keeps these aligned both angulary (to prevent angular misalignment [and associated loss of strength]).
Applying Installation Force
As long as the stud is properly aligned in the hole, you can use your stud installation tool (e.g., an arbor press or hydraulic press that is right for your size and material combination) to apply a loading force. The force applied has to be at a right angle to the panel, to get correct forming of the material and allow effective clinching. For example, to install a 4mm diameter steel stud you need about 5,000 pounds of force. This force can change depending on what the stud and panel material is as well; softer materials like aluminum might require less force, harder materials like stainless steel will require more. Most presses come with a pressure gauge or digital readout that allows you to easily control and adjust the force.
Monitoring the Installation
Taking care of the process while clenching is essential for it to be the right amount and not let it damage the stud, Today’s presses often have sensors so that they know exactly how much weight they are placing on the afflictive point; thus, if the force is constant across every value, each stud can be forced into place with as precise torque as desired. This data is critical in looking for anything to be outside the norm in the install such as under or over power vs wear and tear that would cause a bad clinch or damage to stud or panel.
Inspecting the Clinched Stud
To ensure the stud is being properly held on the panel, inspect after installation force is applied. Look under the underside of your panel and make sure the we pulled a nice round flare with little to no residuals raised where it sits either flush or slightly recessed into our panel surface. This inspection can either be visual or tactile. Look for cracking, splitting and deflection in the panel near the stud which can be signs that the fasteners were not installed properly.
Testing for Secure Fit
Test pull the stud that has been installed to confirm it is secure. The test is a pull-through test, which applies a force to the stud in an attempt to determine how much force would be needed to pull that stud through the panel. It must be engineered to resist a minimum level of force without either buckling or pulling out of the panel. (The force to do this will be higher depending on the stud size and material, but generally at least an order of magnitude higher than the sideloading force used to install the stud.) Confirmation of proper crimping and the required mechanical holding power for the specific loads is evident with this test.
Common Mistakes and How to Avoid Them
Misalignment of the Stud
Unfortunately, when installing self clinching studs, EcnerUCCoPQs== misalignment occurs most often, that is the stud being not perpendicular to the panel. This can in turn result in poor clinching putting too little expansion of the stud (resulting in weak mechanical properties). This is why always use a precision alignment tool or jig to properly fit one in place so you get the best of both worlds. Thereby an angular displacement of them during the application of the force can be avoided in that manner, which is why it is important to check that the setup includes a guide which closely surrounds the stud.
Material Incompatibility Isn’t Right
Another is installing studs and panels that are incompatible in terms of the material strength and thickness. For example, a stud designated for aluminum or other soft material securing use should not be used on a hard stainless steel panel since the lack of expansion of the clinch ring of the stud may cause it to not properly retain the stud. Always refer to the manufacturer’s specifications for the materials of both the stud and panel when determining compatibility. The studs must also be of a hardness that is compatible with the panel to cater for malformation and clinching properly.
Inadequate Force Application
Improper force is also a leading cause of failed installations (i.e. too tight or loose). Too little force will prevent the stud from clinching properly, and too much will either deform the stud or damage the panel. Using an installation tool with our specific force gauge, you can tailor the set to the material type and size of the stud. The force application should be performed with regular calibration of the tool.
Ignoring the Environmental Factors
The properties of the materials being installed are affected by environmental factors such as temperature and humidity. The latter can cause the fasteners to corrode, especially since the studs aren’t corrosion-resistant, where they eventually break loose from the clinch. Always protect the integrity of studs and panels when storing and handling, before installation. Also, in harsh environments the use of materials that are resistant to corrosion or the application of protective coatings.


