
How To Install Self-Pressing Nut Fasteners
To install self-pressing nut fasteners, start by preparing the correct tools and materials. Follow a step-by-step guide: prepare the mounting hole, position the fastener, and apply squeezing force. Avoid common mistakes like incorrect hole size and over squeezing. Consider proper fastener positioning and maintenance for long-term reliability.
Preparing For Installation
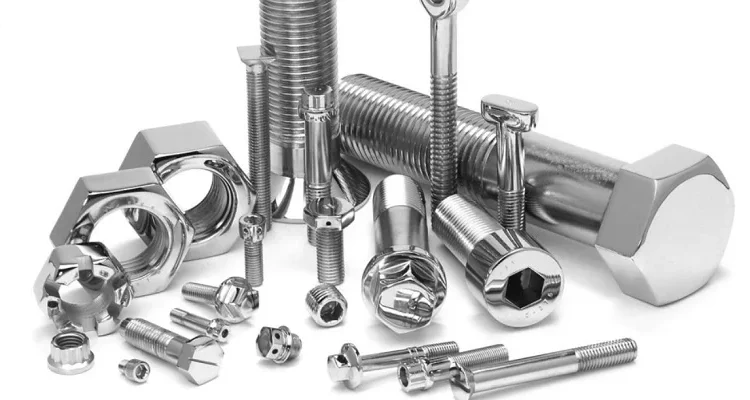
Required Tools and Materials
Required hardware is a punch press, anvil and correct size drill bit, eg 5.1mm for 5mm nut (also the one you used to print holes) & “riv nuts” themselves Tools that match perfectly provide detailed accuracy and decreases the probability of errors in connection. The calibrated torque wrench is a must when it comes to applying the correct amount of force.
Supplies Needed
- Punch Press – A machine to punch in the fastener.
- Anvil : A flat surface beneath the sheet metal being installed.
- Drill : Specific sizes needed ,such as 5.1mm to suit 5mm nuts
- Automatic pressing nuts: The fasteners are to be mounted on the rubbing.
- Calibrated torque wrench: Ensures the correct amount of force is applied.
- Counterbore/Deburring tool: Get rid of sharp edges at the edge around where you just drilled.
- Goggles and gloves: Help keep metal shards away
- Alignment tools: Acts as an assist to keep alignment intact during setup.
Safety Precautions
Use safety goggles and gloves to protect your eyes from metal shards or debris. To avoid injuries, every piece of equipment must be in full working order. In addition to protecting the installer, adhering to safety protocols also contributes towards the optimal installation experience. Make sure all electrical tools are grounded and the workbench is stabled to prevent falls or other accidents.
Safety Checklist:
- Wear safety glasses and gloves: Save yourself from splinters going in your eyes or wood slices cutting through unprotected hands.
- Keep workspace clean and organized: This helps prevent accidents or misplaced tools.
- Test all tools: Validate that the operational condition of each tool is in right working order.
- Grounding of electrical tools: This prevents all kinds of electric danger.
- Stabilize the workbench: In addition to a solid bench, rather more critical it is for you to firmly secure your items beneath.
Preparing the Mounting Hole
Firstly drill a hole of the dimension that is require. For example, a 5mm nut will usually need to go into a hole with at least an opening of around 5.1mm so as not fall out from being too loose or get stuck when trying to thread it onto another part if its smaller than that! Ensure the hole is clean from any metal shavings, debris or anything else that can be in our way during installation. Prep the hole by removing any burrs or other irregularities that would prevent an exact fit. Deburr the hole, using a deburring tool to take off any edge left behind that may prevent the fastener from sitting in there properly.
How to Make the Mounting Hole:
- Select the correct drill bit size (e.g., 5.1mm for 5mm nuts): Ensures a proper fit for the fastener.
- Hole: Drill a hole at the following location (best done via drill press if available):
- Use the eurr tool to round off any burrs: Take away these sharp edges and create a neat hole.
- Hole cleaning: the hole has to be cleaned properly as dirty holes will result in rough surface and also there may some debris that can interfere with fasteners fitting transferred impact so you have to remove dirt from it.
Positioning the Fastener
Insert the press nut into previously created hole. Make sure the fastener is centered and sitting parallel to sheet metal. Anyway, improper seating can lead to misalignment and reduce the fasteners strength. Maintain Accuracy: Avoid position errors by aligning tools or guides If recommended by the manufacturer, also apply a tiny amount of lubricant to the hole for easier insertion.
Fastener Placement Apparatus:
- Orient the fastener 90 degrees to the sheet metal: introduces even pressure application on install
- Align: this will keep everything in place. Use alignment guides and so on to ensure you are going along the right lines
- Insert the fastener into the hole: Ensure it sits flush against the sheet metal.
- A tad bit of lubricant, if suggested: It minimizes rub and makes insertion more comfortable.

Step-By-Step Installation Guide
Preparing the Mounting Hole
If using self pressing nut, choose correct drill bit size for installation. For example, if you are putting a 5mm nut in there, it requires just over 5.1mm drill bit to make sure that the fastener does not bind up – We designed this case as a slightly over-sized option so that it fits just right.
Steps to Drill the Hole:
- Make the Drilling Easier: Use a center punch so that you can create a little groove and sense from there your way on where to drill deep. This allows the drill bit to center itself and not slip.
- Cut the Hole: Clamps or a vise; hold sheet metal in place against any movement. If a drill press is available, utilize it so the hole can be drilled straight. Be sure to keep your drilling slow and steady so that you don’t end up with burrs or irregular holes.
- Hole Cleaning: Clean the hole to remove swarf, all debris and other contaminants after drilling process. Spray some compressed air or brush the heck out of it to ensure that hole was completely cleared.
- Deburr the Hole: Use a deburring tool to remove any burrs from around the hole. A rough edge here will prevent the fastener from being inserted. The fastener needs a quality hole to fit properly in.
Positioning the Fastener
Insert the self-pressing nut to the hole you have made. Make sure that the fastener is totally parallel and perpendicular to the sheet metal. If the alignment is off, it can fail to seat correctly and will ultimately lead to a less effective fastener.
Fastener Placement Directions
- Center the Fastener: Grasp the fastener in such a manner that it lays at right angle to the sheet metal. Verify that you have it absolutely straight by using alignment tools or a square.
- Place the Fastener: Carefully insert fasteners into openings. Being seated should be at the same level as the sheet metal.surface – just in case a proper AppBar is not inserted.
- Ensure Alignment: Make sure that the fastener is absolutely square with, and in the center of, your hole. This will ensure accurate alignment.
Applying Squeezing Force
The fastener is then installed by squeezing the two parts together in a controlled operation performed with a punch press. Apply the force slowly and evenly, this will prevent damaging either the fastener or sheet metal.
How to Apply Squeezing Force:
- Punch Press set up:Make sur the punch and anvil surfaces are parallel. It guarantees uniform pressure as it is installed.
- Set the Sheet and Fastener: Putting sheet which is a fastener that will position in punch press. Actually, check that everything is well-aligned.
- Ease into the Press: To begin, ease yourself slowly while pressing. You might want something like ~600-800 N of force for an average M5 nut. This step by step application prevents any sudden impacts which are most likely to break either the fastener or damage the sheet.
- Control the Force: Utilize a force gauge to measure and monitor applied forces, if available. The trick to preventing over-squeezing is regular practice.
- Double Check Installation: After installation, the fastener should be flush with sheet metal and correctly embedded. However, there should not be any gaps or deformities.
- For instance: Let’s say you are installing an M5 nut that requires 700 N; utilize a punch press calibrated to provide this even force. To prevent this, ensuring the right amount of force is used leads to a safe installation.
Verifying Proper Installation
Once fit, examine your fastener for security and surface-level positioning. Hold and pull out one bolt to test the strength in holding their positions. For an M5 nut, the pull-out strength should normally be around 1000-1500 N.
Steps to Verify Installation:
- Method of Inspection: Check the general positioning of the insert, no obvious stand-off or misalignment is noted. The fastener should sit flat with the sheet metal surface.
- Pull-out Test: Fix the fastener to be pulled out by inserting it into a pull-out tester and then apply a constant force until they move together. Check that the force required is within the range (e.g., 1000 -1500 N for M5 nuts).
- Torque Tests: Test the torque to clamp load characteristics of fasteners under controlled conditions using a specific torque wrench For reference an M5 nut might have to resist 8-12 Nm of torque.
- Record the Results: Save pull-out and torque test results for quality control in addition to future reference. If nothing more, you will need this documentation to demonstrate compliance for quality control and site audits.
Common Mistakes To Avoid
Incorrect Hole Size
One of the biggest mistakes that is made when installing nut fasteners or a self-pressing device,in general,incorrect hole size. This step is where your precision matters the most as even a small change can ruin that fastener.
Details:
- Oversized: A hole that is too large may allow the fastener to rotate under load or lose engagement entirely. For example, a 5mm nut needs an opening of about 5.1mm and by using the wrong drill bit can cause your project to be unstable. Otherwise, the fastener can slip on you and fail when in use.
- Under Sized: A hole that is too small will not allow the fastener to make it through and therefore might now completely seat. This could result in the fastener standing out or not fully engaging and potentially failing to achieve proper retention force.
- Resolution: Make sure that you measure the hole size with calipers EVERY TIME before embedding a screw in it. Ensure a precise fit by using the drill bit size specified by the fastener manufacturer. A 5mm nut as an instance, would possibly require a five.1mInterested by proper insertion and sitting flush in the hole are English Re-measure and make sure that the drill point is sharp as well.
Over Squeezing
Putting excessive force on top of the installation is yet another mistake. A fastener squashed too much can break, crack across the head (especially in case-hardened materials), or unwind inside out; thereby rolling over and damaging its host sheetmetal.
Details:
- Heavy-Handedness: Over-tightening can distort the fastener and destruct its holding strength, leaving your device running to loose ruins. The metal securing bolt could bend or snap the threads.
- Correct Force: For a regular M5 nut, the force should be between 600 and 800 N as an optimal range, using this more pressure can hurt both fastener (stud) and sheet-metal. When installed the fastener should sit flush with the sheet without any deformation.
- Problem: Do not use excessive force (manu. Specs soln.) Run the calibrated punch press throughout each hole created at low force settings, which you also control with a gauge to ensure it never exceeds useable strength. Before you begin, conduct some test installations on scrap material to find the appropriate level of pressure.
Improper Fastener Positioning
Proper alignment and placement of the nut is crucial to a strong attachment. Even one degree of misalignment can create localized areas with an excess force, upsetting the balance and health fastening system.
Details:
- Fixings not aligned: failure to locate at 90 deg with the sheet, leading non-uniform contact with subsequent part which may lead to a future stress/higher potential of keytec-levels=”#”>failure The fastener could end up uneven or leaning to one side, which would compromise its holding effectiveness.
- Proper Alignment: Insert the fastener with the bolt straight and center in to hole. The fasteners must be tightened until the top of each one is flush with the sheet surface.
- Resolution: Align guides in installation to maintain proper position. Always line up your alignment marks again before you start putting force to avoid any misinterpreation. Make use of a jig or fixture to keep the fastener in placement as you tighten it.
Neglecting Safety Precautions
Failure to do so can result in injury and poor installation quality. Furthermore, safety protocols help to ensure the installer and the installation itself remains safe.
Details:
- Safety Gear – Neglecting to put on safety goggles and gloves can cause metal shards or debris in your eyes, fingers. Metal flakes are likely to cause eye damage while sharp corners may cut your fingers.
- Equipment Check If tools are not working, then malfunction and accident can happen. If the tools start failing, then you will be applying force unequally (this is a major issue)- and enjoy an unexpected knock at the door!
- Fix: The solution here is to always wear the right safety gear and ensure that all equipment are in perfect working conditions. Inspect tools periodically for safety and effectiveness.
Failing to Clean the Hole
Debris or a burr in the drilled hole will make for an uneven surface causing problems during installation and then to hold is questionable.
Details:
- Debris: shavings in hole can prevent fastener from seating properly This would result in voids and looseness of fastener grip.
- Burrs: Edges on the hole can be sharp and catch onto an fastener’s threads when installed wrong Fasteners that are not completely embedded into the sheet may cause burrs and prevent your fastener from sitting flush with the sheet.
- Resolution: Be sure the orifice is sparklin’ clean, use a deburring device to break down any sharp edges after hitting that hole with air pressure of brush action. This makes certain that the fastener can mate in to there pot correctly and firmly. Before you put the fastener in, perform a final check of the hole and make sure that it is clean and has no hurd if not clean properly.

Installation Considerations
Material Compatibility
For example, if incompatible materials are used then you may face galvanic corrosion – in which two different metals that come into electrical contact with a conductive liquid corrode at an accelerated rate.
Details:
- These are the fire safety keeping points that should be taking in to consideration:Fuel: Determine whether fires is ignition source present on site? Premediation Fires of lighter fuels which can spread across floors and enter ceilingspaces more rapidly than heavier types. If the assembly bag will be exposed to moisture, saltwater or chemicals
- Recall: Follow the manufacturer’s recommendations for material compatibility. Coatings and surface treatments: Improve operating life in harsher conditions For example, through the use of coatings such as zinc-plated or galvanized to prevent rust.
- For example – If you are using the hardware in outdoor projects which will be exposed to rain, stainless steel or coated is perfect. Regular steel hardware will rust, and you run the risk of seeing this issue down the road.
Environmental Factors
The service environment has a direct effect on the performance and life of fasteners. Moisture, Chemicals and Temperature Variation
Details:
If you live in a very humid area, or your door may have moisture exposure (such as from the rain), use stainless steel screws. Apply protective coatings
- Temperature Variations: Fasteners that are able to endure thermal expansion and contraction without losing integrity should be used in environments with severe temperatures. Only suitable for very high-temperature materials such as Inconel
- Suggested Solution: Evaluate specific weather conditions and choose appropriate fasteners/materials that are suitable. Regular check fasteners see that they are in good condition.
Maintenance and Inspection
The fasteners installed need to be maintained and inspected regularly to preserve their longevity as well as reliability. Failure to maintain Assembly may Cause Unseen Wear on the assembly that will compromise its integrity.
Details:
- Quick CHECKS: Verify the fasteners are still properly torqued using a torque wrench. Fasteners with loose can create cause for failures and should be attended to immediately. Keep it torqued to the spec for an M5 nut (8-12 Nm).
- Document: Record any inspections or maintenance you do. This makes it easy to monitor the state of your fasteners and allows you regular maintenance practices.
- Solution: Schedule routine maintenance and develop procedure for inspection by well-informed personnel. Attend to any withering or damaged electrical fittings without brain wave.
e., in a production environment, schedule seeing to it all bolts are checked monthly on important equipment as well as tightened and/or replaced if essential.
Required Installation Force and Method
Key factors to ensure secure and proper installation of the fasteners include applying correct force as well as using appropriate techniques during fixing.
Details:
- Similarly use a punch press with the recommended force that is calibrated. An M5 nut for instance might need a 600-800 N force, which is too little hard ( so it can deform) or to less soft that you still do not have a good fit.
- Sustainment of Force: The force should be maintained. Sudden impacts can ruin the fastener or damage sheet metal. Never use hammers or other brute force implements.