
5 Tips for Using Pocket Screws
Choose the correct screw length, use clamps for alignment, drill pilot holes, adjust drill depth, and apply glue for added stability
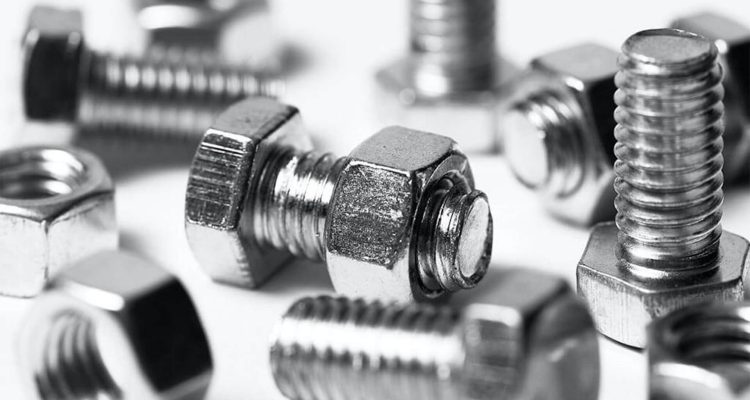
Choose the right pocket screw
Pocket screws are known for providing quick and secure joints, but choosing the right pocket screw influences the strength and longevity of these joints. While it may have seemed to you that all pocket screws are the same, there are several features you might need to consider:
-
Material type. Depending on the material you are working with, you should choose coarse-threador fine-thread screws. For example, coarse-thread screws are preferable when working with oak, while for pine both types of screws would be possible. You can see a good case of how choosing a wrong material type screw cost Alex a lot of time and effort — MI Alex -. They split wood and resulted in an unsecure bookcase.
-
Screw length. It is vital to choose the right length of the screw to avoid splitting the wood inside. The guideline is that the screw should be around one and a half times of the wood thickness you are attaching. Thus, the 1 1/4 screw would be ideal to attach a3 /4 wood thickness. An example of how choosing the wrong screw length can result in a weakness of the joint would be using 1-inch screws to attach 3/4-inch plywood using filling cabinets. Instead of creating secure joints, you would have a weakened structure that collapses instead of providing enough support for the cabinet.
-
Head type. There are two types of heads pan heads or washer heads. Pan headsare preferable when working with harder material to avoid split and distributed load evenly. Washer heads are best for soft materials because of a larger bearing surface. Mary could notice inconsistence quality and a slight decrease in hardness in joints in some places while working with a mixture of harder and softer woods. She concluded that splitting on a softer screw type would lead her to use only harder screw types in a later similar project.
-
Coating and finish. Often pocket screw projects could be used outside meaning that the screw’s coating is essential for its longevity. For projects inside, it is best to choose zinc-coated screws to avoid it getting rusty and damaging the surface it is connecting. Outside it is wiser to use stainless steel or polymer-coated screws, since rain is going to make them rusty very quickly as unprotected screws. Here you can see an example of how once Sarah used the wrong finish of the screw and got them to rust, destroying the wood around them instead of transmitting load.
-
Drive type. The drive type affects how easily the screw is going to be driven in. Usually, Torx drives require additional force, but also allow you to apply more force and do not wear the screw head. Many projects were tested. We were speaking about tearing the screwhead and kept breaking drill bits tomorrow. The torque you could apply was notably higher for Torx drives, so I think it would not be wise to use anything else for outdoor projects.

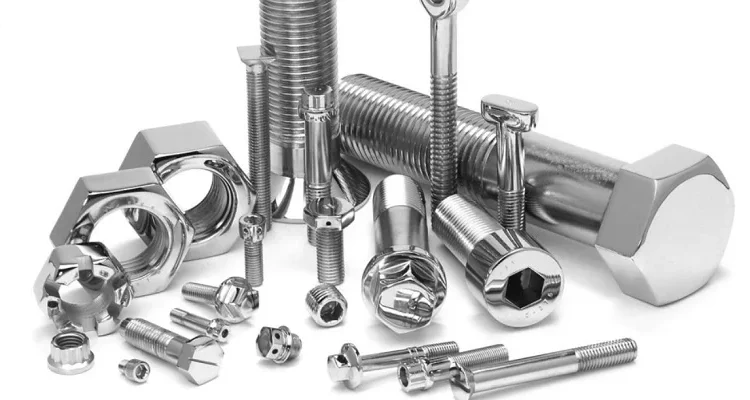
Choosing the Correct Screw Pocket Screw
Preparing and setting up the drilling jig
If you are looking for the most accurate and consistent pocket holes, the drilling jig needs to be set up properly. Here is a step-by-step guide on how to prepare and set it up correctly.
Choosing the Right Jig
Choose the right jig that fits the size and nature of your project. Use a heavy-duty one for larger furniture pieces and a smaller, more portable jig for lighter ones and repairs.
Example: Tim, a carpenter, was making a large dining table. A robust Kreg K5 jig allowed him to keep the joints precise and stable for that and dozens of other connection solutions, maintaining the professional quality of his work.
Adjusting the Depth Collar
The depth collar on a drill bit determines the maximum depth of the pocket hole. Set its position based on the thickness of the wood you use for making holes. For 3/4-inch material, locate it at 3 1/2 inches from the tip of a drill bit.
Example: Laura, a DIYer, set the depth collar too low and kept it uneven, which resulted in her pocket holes becoming weak and unreliable. After adjusting the collar’s depth to 3 1/2 inches for her 3/4-inch-thick plywood shelves, the joints became stronger and provided more support.
Secure Clamping
Use a strong clamp and secure the jig firmly when drilling.
Example: During a workshop, participants noticed that loose jig clamping led to shifted and uneven holes. After securing the clamp to the fullest extent, the alignment improved, and the joint fits became more consistent in their projects.
Drill Guide Placement
Align the drill guide accurately to your material. If you are attaching pieces on edges, place it in the center of the facing edge of a board, and if the connection is through two boards, the guide should align with a preferable pocket hole position.
Example: Jake was assembling a frame and initially misaligned the guide for a better standing base. After placing the drill guide in the center of the edges, the pocket holes became evenly spaced and aligned, and the frame was more stably standing.
Marking the Drilling Points
Precisely plan the points where you want to have pockets ahead of time. For most projects, having them 6 to 8 inches apart is good spacing. For smaller-sized pieces, space them closer.
Example: Emma marked her drilling points too far apart when she was attaching an inner part of the cabinet to the door, which made it weaker. After putting them 6 inches apart, the attachment became strong and uniform throughout.
Precise drilling
Achieving accurate drilling is a crucial step for making precise and strong pocket screw joints. Here is how it can be done:
-
Selecting a drill bit. A stepped drill bit can be used. The smaller end is the pilot tip, which is inserted into the jig to guide the drill. The larger end is the main section that functions to remove most of the material when drilling a pocket hole.
-
Example: when using the regular type of a drill bit for the same purpose, a novice woodworker Mike produced a just hole in the workpiece. The equivalent risk can be observed in the future if he fails to use this important detail of pocket screw equipment.
Determining a speed
It is important to find the speed that allows for not burning the wood nor rendering the drill bit useless. A drill bit that is moved too quickly will not be effective. A too slow a pace can ruin the material.
-
Example: Sarah has learned from the samples of practice in making a coffee table the optimal speed for a softwood such as oak – around 1500 RPM. This procedure allowed her to make a clean and precise pocket hole without spoiling the workpiece by burning it.
Holding a drill properly
When cutting wood, one hand should press the drill against the jig in which the workpiece is inserted. The other hand should be holding the drill perpendicularly to the jig and, consequently, the workpiece, in order to make straight holes.
-
Example: during a learning procedure, tutors gave an opportunity for all participants to practice the proper position of holding the driller. Those people who followed the instruction to hold a driller perpendicularly achieved straight identical pocket holes. Ill use of pressure during whole drilling procedures resulted in the inability to do a good job for others.
Demonstration of:
-
Drilling a pilot hole. The hole will be guidance for the larger drill bit that will soon follow, especially when wood is very hard (ordinary plastic wood, for example, is best suited for practicing precise drilling). Such actions helped participant Jane, who had problems with creating a precisely cut pocket hole in maple. The first drilled hole 1/8 inch in diameter made the next secondary bigger hole perfect. Thank Tom, an experienced and honest carpenter showed that for achieving perfect and timely identical pocket holes. He needs to concentrate on supplying medium constant pressing the pulse width of the drills trigger.
Assemble wood pieces securely
Securely assembling wood pieces with pocket screws ensures the strength and durability of your projects. Here’s how you can achieve secure assembly:
Align the Wood Pieces
Proper alignment is key. Use clamps to align the wood pieces when assembling your project. This holds everything together so your joints don’t move. As a result, the joints are tight and accurate.
Example: John was building a bookshelf. He attached a shelf in between two sides of the bookshelf with bar clamps. The clamps ensured a perfect alignment of the shelves and sides without any gaps, providing a flush and professional look.
Apply Wood Glue
Adding wood glue to the pocket joints makes the connection stronger. Apply a fine layer of wood glue on the face of the mating parts before assembly. This way your project will be much stronger than with screws alone.
Example: Emma was building a dining table. She applied a thin layer of wood glue to the pocket joints and then screwed the table together with pocket screws. The table could withstand a lot of weight and use, which proved the strength that the added glue brings.
Drive the Pocket Screws
The pocket screws must be driven correctly in order to have secure joints. Put screws in the predrilled pocket holes and drive them in evenly by applying the same speed. Keep driving them until the screw head is fully seated but not all the way. If the screw is over tightened, it can strip the hole or make a split.
Example: Mike found out that, when he added too much force while driving screws, the screws kept falling out of his cabinet project. He then adjusted his driving technique, applied even force and stopped on time. He then had secure and lasting joints.
Check for Gaps
Check the joints for gaps while the glue is drying. Gradually tighten screws to close the joint spacing if they’re off a little bit. Always make sure that the pieces are tight and aligned.
Example: Sarah was building a wooden frame. Just before the glue dried, she noticed that some joints had small gaps between them. She then gradually tightened the screws and got rid of the gaps, creating a joint without any separations.

The Ultimate Guide to Pocket Holes – The Handyman
Check and repair seams
Important For woodworking projects, it is essential to check and repair seams properly. Here is how to achieve the desired result:
-
Check All the Seams
-
Tighten the Loose Screws
-
Fill the Gaps with Wood Filler
-
Sand the repaired Areas
-
Reapply the Finish if Necessary
Check All the Seams
Start the process by closely looking at all the seams. Make sure to notice both gaps between the woods and the screws being loose. Use a flashlight in more complex places to catch all the discrepancies, and do not hesitate to use a magnifying glass to check every seam.
Example: Lisa created a wooden coffee table, and later on, she saw gaps in some seams by using a flashlight for closer examination. The problem was loose screws that resulted in minor misalignment, so by inspecting it closely, she was able to tackle the problem.
Tighten the Loose Screws
In order to make the seams tight, one should tighten screws that have become loose. To fix the issue, grab a screwdriver and move it to the right until you feel some resistance, which means the screw is tight now. One should not over tighten, as the risk of stripping the hole is high.
Example: Jim built a bookcase using some screws, and a year later, he examined the seams and noticed that some screws were loose. He tightened each of them carefully to ensure the accuracy of the seams on the bookcase.
Fill the Gaps with Wood Filler
If there were some gaps in the seams, they should be filled with wood filler, which should match the color of your coated wood. One should use a putty knife to apply the wood filler, pressing it to the seam, and make it flat with the surface.
Example: Emily built a wooden frame, and she noticed that there were some small gaps in the joints after a more thorough inspection of the seams. She used a wood filler that was the same color as the coating of her frame, applied it and smoothed with a putty knife. Later, after reinforcing the seemingly checked seams of the frame with this filler and sanding it down, it was impossible to notice the junction and the gaps, as the frame looked perfect.
Sand the repaired Areas
After you made sure there are no gaps, and the screws have become tight, it is time to sand the seams to make the area flat. In order to smoothen, sand the area with 220-grit sandpaper.
Example: Tom was making a table, and after the assembly, he saw that there were some gaps which he filled with a wood filler. After it dried, the only thing he had to do is to sand the seams with a 220-grit sandpaper as the final touch before staining.
Reapply the Finish if Necessary
In case your project is covered with some finishing layer, reapply it to the sanded parts to make sure all the account for seems to be rechecked and restored. The finish will make your project polished and safer for the wood.
Example: Jane repaired an oak chair and sanded the seams that were reinforced with wood filler. The final finishing step was reapplying the stain a vitally significant one when the previously checked area tint should be combined with the untouched wood.