

5 Essential Tools For Effective Rivet Removal
Effective rivet removal tools include cobalt drill bits, air rivet punches, angle grinders, sturdy pliers, and essential safety gear like goggles and gloves for protectio
Table of Contents
TogglePunch and Hammer
of the traditional methods to remove rivets without more sophisticated tools, better suited when working with soft materials or when accuracy is not the priority, is the punch and hammer method. In this method, a metal punch is used — these are usually made of hardened steel to make them more durable — along with a hammer, typically a ball-peen or a claw hammer depending on what the user will be using and what is needed for a job.
Preparation and Safety
Prior to beginning the rivet removal stage, it is important to wear safety glasses to shield your eyes from flying pieces. Although gloves are also suggested to protect your hands from those very same sharp edges and impacts. Make sure to empty your work area of debris and secure whatever holds the rivet to minimize slippage.
Aligning the Punch
Proper placement of the punch is key to a good job when it comes to removing rivets. Place the punch directly on top of the head of the rivet. A gentle ‘I love you’ kiss from the sledge, or even a baby center punch spot before using drill for cleaner action during drill. The hex prevents the punch from bouncing off when you start hammering on it.
Hammering the Punch
Use a hammer and hit the punch with uniform and moderately controlled blows. It may require a different level of force depending on the piece, but generally enough pressure should be applied to the punch so as to push it into the rivet and out the hole. When hitting it is very important to hit as level as possible to avoid the punch from slipping and ultimately damaging all the materials around it.
Removing the Rivet
After a few more strikes, the rivet should start to come loose. When it is loose enough, the rivet can be removed from the material. For those of the rivet substance that still remained in the hole, take pliers and hold over top then pull. Andyou might need to move your hand a little differently to get it to where the rivet isn’tched and fragmented and will fall right out.

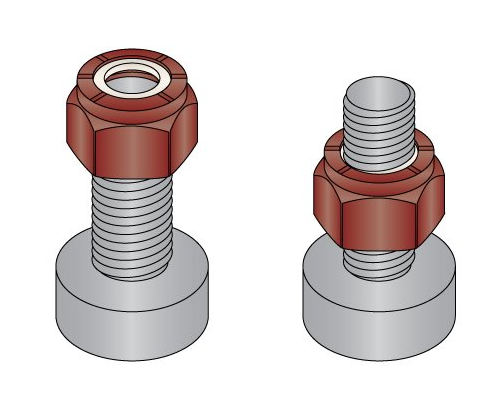
Rivet
Pliers and Vise
Using the proper type of pliers and vise is key if you want to remove rivets without messing up the surrounding material. Vise-Grips or locking pliers However you want to call them are awesome because they can be clamped onto the rivet which gives more leverage and control. Look at the pliers and make sure that the teeth are sharp and not worn out, it will slip if the teeth are worn out, and accidents will happen. Check that the vise has good jaws that work well and do not up and down too much and have smooth mechanisms.
Securing the Material
But first, secure the material well in the vise. The is stops any movement being played and creating a steady area to work on. The vise should be tightened a little too hard but not too hard as to deform the material. The rivet I placed felt easy to access and was clearly visible, crucial for preventing a misalignment in riveting.
Gripping the Rivet
When you have lined up the material, expand the locking pliers to grip the rivet body tightly. The adjustment is needed so that the pliers remain in place on the rivet with how ever much pressure you apply. The pliers are locked in position to keep the grip. This is especially useful when working with larger or more difficult-to-winkle rivets, as the additional grip strength can aid in the prising process.
Applying Force
Whilst the pliers are locked into place pull on the rivet until it comes free. It should be straight out, or else you’ll bend or snap the rivet, and then you’ve got a real troublesome rivet to remove. With some rivets, it may require a combination of twisting and pulling to free the rivet from the hole.
Handling Stubborn Rivets
In instances where the rivet does not easily come out, additional tools such as a hammer can be used to gently tap on the pliers. Even very light tapping can be successful in freeing up a corroded or adhesive rivet ready for extraction. Note—Always wear safety glasses, as this can cause metal to chip off in a small burst.
Air Hammer
Choosing the right air hammer to use is crucial to an easy rivet-removal process. The fasteners will look blunt after being cut, making the stem of a more traditional rivet removal tool a better choice where appearance is a concern but subsequently harder to insert into holes. To make sure it works to its utmost potential, the air pressure needs to be properly adjusted within the 90 to 120 psi range based on what the manufacturer requires.
Setting Up the Air Hammer
Make sure that the air hammer is connected to a tank with a good air hose, before using the air hammer. Do check the connection for any leaks as air leaks will quickly minimized the efficiency of the tool. Install a suitable size chisel bit. This part should be clean and damage-free to help with the process of removal.
Positioning the Air Hammer
Position the air hammer so that the chisel bit is parallel with the head of the rivet. This design directs the force properly allowing it to be applied in a straight line so it is effective but without slipping or damaging the rivet. A hammer can recoil once you use it. Stand so that you are firmly in control of the hammer.
Operating the Air Hammer
Initiate the air compressor and make modifications to the hammer setting just at the minimum level. Increase the strength as required. In short bursts, start the rivet through the hole and check often and the material is still flat before moving into more final length rivets. That controlled burst, he says, allows the rivet to come loose quite well.
Finalizing Rivet Removal
You may need to move the air hammer around a bit to get the rivet out as it loosens. After the rivet is basically loose, you can go ahead and take the rest of the way out with a long pair of pliers or with your hand (while wearing gloves). WARNING: Clear the work area of debris and removed rivet pieces for a safe working condition.
Heat Gun
The best heat gun is important to remove the rivets properly. Select a heat gun with temperature settings from around 200°C to 600°C allowing for control over the heat based on the material (for instance aluminum rivets require less heat than steel rivets)
Preparing the Workspace
Here is a generalized step-by-step process starting with making sure you clean and well-ventilate your workspace and keep all flammable materials away from your area. Prepare a heat resistant base, anti-heat gloves, safety goggles and all safety equipment needed.
Applying Heat
Adjust the heat gun, so it is 3-5 inches from the rivet. Begin with a decrease temperature setting and increase just as required. Direct the heat at around the head and body of the rivet and do so for about 30 to 60 seconds. This expands the metal and makes it less tight, so easier to remove.
Testing Rivet Looseness
And finally, check cool off and check the rivet with a pair of pliers to see if the rivets too lose. If it does not budge, apply heat for an additional 20-30 seconds. Overheating can compromise the material around the rivet, so be careful not to do so.
Completing the Removal
After the rivet has been loosened, use a punch and a hammer to gently tap the rivet from the material. If necessary, the rivet can be subjected to heat for longer to make it move, but doing so should be carried out in little phases, so you only reach the required temperature without making the plate too nasty.

Solutions for Small Rivets
Chisel
Choosing the right chisel for your job is essential for a successful removal of rivets. A flat-headed chisel is a common variety of cold chisel, especially in metal work. The chisel needs to have a width that is slightly under the size of the rivet head to prevent damage to the surrounding material but allow for focussed driving. Durable chisel from hardened steel can keep the edge sharp for a long time under repetitive striking.
Getting the Chisel and Hammer Ready
Make sure chisel is sharp and without burrs or imperfections prior to starting. An example of this is a chisel which is slipping due to the reason which is it is getting duller, should anything of the case occur it may cause the person to get injured or it may damage the material! Use a ball-peen hammer that is the appropriate size for the chisel and rivet. The hammer needs to be heavy enough to hammer in the chisel, but not so heavy that it causes fatigue after using it over and over again.
Positioning the Chisel
Put the cold chisel at the base of the rivet head, perpendicularizing it to the surface. This placement is necessary to allow the force to be applied as straight down as possible on the rivet to reduce the chance of head slippage and metal deflection.
Striking the Chisel
Hit the chisel hard with the ball-peen hammer How much force you will need is going to match the material of the rivet and the size of the rivet. On some larger or stronger rivets you may need to repeat the process with several firm strikes. Strike with control and accuracy so the chisel does not slip off the rivet.
Removing the Rivet
You can then switch to a thinner chisel or punch to continue driving the body of the rivet out of the material after the head has been cut or sufficiently deformed. The careful application of the rivet and measuring the blows will ensure that the rivet is removed without causing more damage.
相关文章
Avoid 6 Common Screw Mistakes
Using the wrong…

What is the difference between a solid rivet and a blind rivet
The main differ…